Have you ever experienced water damage or erosion caused by rain water overflowing from your roof? This is a common problem for many homeowners and can lead to costly repairs. Fortunately, there is a simple solution that can prevent this issue – roof splash guards. Make sure to keep reading to find out how this small addition can save you from big headaches.
What is a Roof Splash Guard?
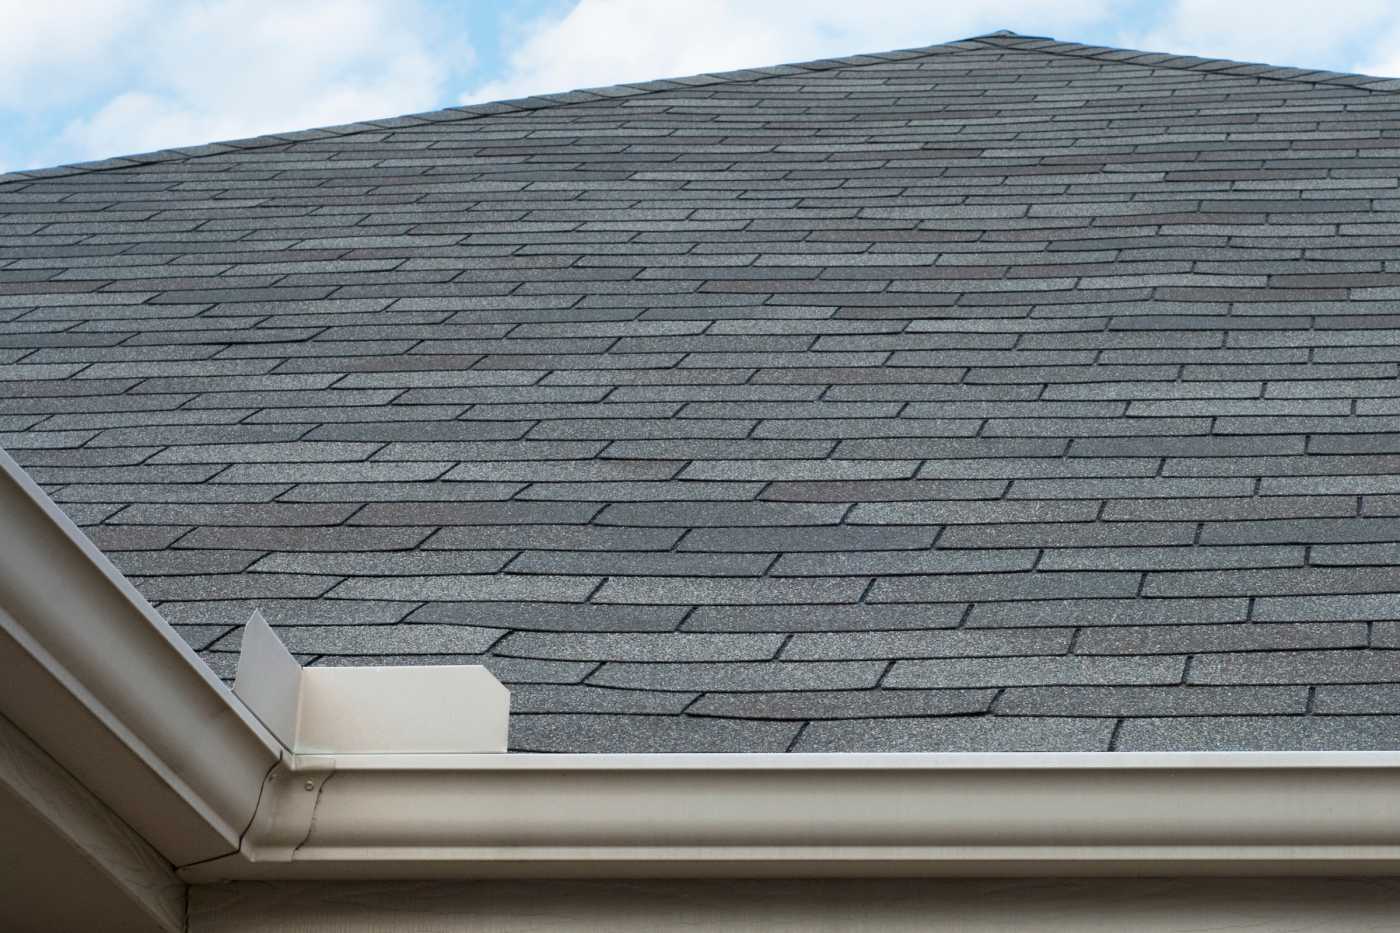
A roof splash guard is a crucial protective device that is installed along the edge of a roof to prevent water from overflowing the gutters and causing damage to the building’s foundation. Its primary function is to direct rainwater away from the roof and into the gutter system, ensuring proper drainage. These guards are typically made of strong materials such as metal or plastic and are specifically designed to withstand various weather conditions. Furthermore, they play a vital role in preventing the formation of ice dams and the accumulation of debris in the gutters, ultimately enhancing the overall functionality and lifespan of the roof.
Why Do You Need a Roof Splash Guard?
A roof splash guard is a necessary addition to your property to prevent water damage. It serves to redirect rainwater away from the building’s foundation, preventing erosion and potential structural issues. Without a splash guard, rainwater can accumulate and seep into the foundation, leading to expensive repairs. Furthermore, it also helps protect any landscaping and hardscaping elements near the foundation.
By installing a roof splash guard, you can ensure the long-term durability and stability of your property while minimizing the risk of water-related damage. So, why is a roof splash guard essential? To safeguard your property and avoid costly repairs in the future.
What Problems Can a Roof Splash Guard Solve?
A roof splash guard can solve various problems related to water runoff and damage to the foundation and landscaping.
Preventing erosion: Splash guards redirect water away from the foundation, preventing soil erosion and potential damage to the structure.
Protecting landscaping: By channeling water away from flower beds and plants, splash guards ensure that the landscaping remains intact.
Minimizing basement leaks: Splash guards prevent excessive water from flowing into the basement, reducing the risk of leaks and water damage.
Preserving the foundation: By managing water runoff, splash guards help maintain the integrity of the foundation, preventing cracks and structural issues.
Preventing mold and mildew: By redirecting water away from the walls, splash guards help prevent the growth of mold and mildew.
What Are the Different Types of Roof Splash Guards?
When it comes to protecting your home from water damage, roof splash guards are an essential component. These simple but effective devices help to redirect the flow of water away from your roof and foundation, preventing potential leaks and structural issues. In this section, we will discuss the different types of roof splash guards available, including gutter splash guards, roof diverters, roof valley splash guards, and downspout splash guards. By understanding each type, you can make an informed decision on which one is best suited for your home.
1. Gutter Splash Guard
A gutter splash guard is a crucial element in preserving the integrity of your roof and preventing water damage. To install a gutter splash guard, follow these steps:
Measure and cut the splash guard to fit the length of your gutter.
Thoroughly clean the roof and gutter to ensure proper adhesion.
Position the splash guard at the edge of the gutter and install it on the roof.
Secure the splash guard to the gutter using screws or adhesive.
There are various materials available for gutter splash guards, such as aluminum, plastic, copper, and stainless steel. Regular cleaning and inspection, as well as timely repair or replacement of damaged splash guards, will help maintain their effectiveness. For added protection against debris, consider installing gutter guards in addition to the gutter splash guard.
2. Roof Diverter
A roof diverter is a useful tool for redirecting water from the roof to a specific location, preventing potential water damage and erosion. Here are the steps to properly install a roof diverter:
Start by measuring and marking the desired location for the diverter on the roof.
Ensure that the roof is clean and dry, free from any debris.
Carefully place the roof diverter in the marked location, making sure it is level.
Secure the diverter to the roof using screws or nails.
Connect the downspout or drainage system to the diverter to direct the water flow.
Roof diverters are typically constructed from materials such as plastic, aluminum, or stainless steel, providing durability and resistance to various weather conditions. To keep the roof diverter in good condition, it is important to regularly clean and inspect it for any damage. If any damage is found, repair or replace the diverter as needed. Installing gutter guards can also help prevent debris from clogging the diverter.
3. Roof Valley Splash Guard
A roof valley splash guard is a crucial element in preventing water damage in the roof valleys of a building. Follow these steps to properly install a roof valley splash guard:
Measure the length of the roof valley and cut the splash guard to fit.
Clean the roof and gutter to ensure proper adhesion of the splash guard.
Install the splash guard on the roof valley, making sure it covers the entire length.
Secure the splash guard to the gutter using screws or adhesive.
Roof valley splash guards have been used for centuries to redirect water away from vulnerable areas of roofs. In the past, they were often made from materials like wood or stone, serving both functional and decorative purposes in architecture. Nowadays, modern materials such as aluminum or plastic are commonly used for their durability and easy installation, providing effective water management.
4. Downspout Splash Guard
A downspout splash guard is an essential component of a roofing system that helps prevent water damage and erosion around your home’s foundation. Installing a downspout splash guard involves the following steps:
Measure and assess the necessary length for the downspout splash guard.
Clean the area around the downspout and ensure it is free from any debris.
Attach the downspout splash guard securely to the downspout.
Secure the splash guard to the wall or ground to prevent any movement.
Downspout splash guards are typically made of materials such as plastic, aluminum, or stainless steel. To maintain your downspout splash guard, regularly clean and inspect it for any damage. If needed, repair or replace any damaged splash guards to ensure proper functionality.
More detailed roof splash cutter installation ideas
Installing a roof splash guard is an important step in protecting your home from water damage. In this section, we will discuss the step-by-step process of installing a roof splash guard. From measuring and cutting the splash guard to securing it to the gutter, we will cover all the necessary steps to ensure a successful installation. So, let’s get started and learn how to properly install a roof splash guard for maximum protection against water runoff.
1. Measure and Cut the Splash Guard
When installing a roof splash guard, the first step is to measure and cut the splash guard to the appropriate size. This ensures a precise fit and efficient water diversion. Here is a step-by-step guide on how to measure and cut the splash guard:
Using a measuring tape, measure the length of the area where you want to install the splash guard.
Transfer the measurements onto the splash guard material, marking the desired length.
Using a straight edge or ruler, create a straight line across the material to represent the cut line.
Carefully cut along the marked line using a saw, tin snips, or a hacksaw, depending on the material of the splash guard.
By following these steps, you will have a properly measured and cut splash guard ready for installation.
2. Clean the Roof and Gutter
To properly prepare the roof and gutter for the installation of a roof splash guard, follow these steps:
Clear debris: Remove any leaves, twigs, or other debris from the roof and gutter.
Sweep or brush: Use a broom or brush to sweep away dirt and loose particles from the roof surface.
Inspect for damage: Check for any signs of damage, such as loose shingles or cracked tiles.
Clean gutters: Use a scoop or trowel to remove any leaves, dirt, or blockages from the gutters.
Flush with water: Use a hose to flush out the gutters and downspouts, ensuring proper water flow.
Remove stains: For stubborn stains or discoloration, consider using a roof cleaner or a mixture of water and mild detergent.
Rinse: Thoroughly rinse the roof and gutters with clean water to remove any remaining residue.
By following these steps, you can ensure a clean roof and gutter area before installing a roof splash guard.
3. Install the Splash Guard on the Roof
To properly install a roof splash guard, follow these steps:
Measure and cut the splash guard to the desired length.
Clean the roof and gutter to ensure a clean surface for installation.
Position the splash guard on the roof, aligning it with the edge.
Secure the splash guard to the roof using screws or adhesive.
Attach the bottom edge of the splash guard to the gutter, ensuring a snug fit.
As for a historical anecdote, the practice of installing roof splash guards dates back centuries. In ancient Rome, gargoyles were used as both functional and decorative splash guards on buildings. These stone sculptures directed rainwater away from the walls, protecting the structures from damage. This clever solution to prevent water damage has evolved over time, with modern materials and techniques now being utilized for the installation of roof splash guards.
4. Secure the Splash Guard to the Gutter
Securing the splash guard to the gutter is a crucial step in the installation process. Follow these steps to ensure a proper attachment:
Place the splash guard against the gutter, making sure it is aligned correctly.
Use screws or nails to secure the splash guard to the gutter, evenly spacing them along the length of the guard.
For added stability, consider using adhesive or sealant to attach the splash guard to the gutter.
Repeat this process for each section of the splash guard, ensuring a secure attachment to the gutter throughout.
Fact: Properly securing the splash guard to the gutter is essential in preventing water overflow and potential damage to your roof and foundation.
What Materials Are Used for Roof Splash Guards?
When it comes to protecting your home from water damage, roof splash guards are an essential component. But what materials are commonly used to create these simple yet effective devices? In this section, we will discuss the various materials that are used for roof splash guards and their unique properties. From lightweight aluminum to durable stainless steel, each material offers its own advantages and considerations when it comes to selecting the right splash guard for your roof.
1. Aluminum
Choosing aluminum as your roof splash guard material offers numerous benefits.
Lightweight: Aluminum is lightweight, making it easier to handle and install.
Durable: It is highly resistant to rust, corrosion, and weathering, ensuring a long lifespan.
Cost-effective: Aluminum splash guards are affordable and provide excellent value for money.
Easy maintenance: They require minimal maintenance, saving you time and effort.
When considering your options for a roof splash guard material, keep these suggestions in mind to ensure optimal performance and durability.
2. Plastic
When it comes to roof splash guards, plastic is a popular material choice due to its durability and affordability. Installing a plastic roof splash guard involves a few simple steps:
Measure and cut the plastic splash guard to the desired length.
Clean the roof and gutter to ensure proper adhesion.
Install the splash guard on the roof, positioning it to catch water runoff.
Secure the splash guard to the gutter with screws or adhesive.
Plastic roof splash guards have been widely used since the 20th century. With advancements in plastic manufacturing, they became a cost-effective solution for preventing water damage and erosion caused by uncontrolled roof runoff. Their lightweight nature and easy installation make them a popular choice among homeowners and contractors alike.
3. Copper
Copper is a popular material used for roof splash guards due to its durability and aesthetic appeal. Here are the steps to install and maintain a copper roof splash guard:
Measure and cut the copper splash guard to fit the desired area.
Clean the roof and gutter before installation to ensure proper adhesion.
Install the copper splash guard on the roof, aligning it with the edge to prevent water from overshooting.
Secure the splash guard to the gutter using screws or clips to ensure stability.
To maintain the copper splash guard:
Regularly clean and inspect the copper splash guard to remove debris and prevent clogs.
Repair or replace any damaged copper splash guards to maintain their effectiveness.
Consider installing gutter guards to further protect the copper splash guard and prevent debris accumulation.
4. Stainless Steel
Stainless steel is a highly sought-after material for roof splash guards, thanks to its durability and resistance to corrosion. It offers long-lasting protection for your roof by effectively diverting water away from the fascia and foundation. Installing stainless steel splash guards is a breeze and they require minimal upkeep. They are also available in a variety of sizes and designs to match different roof types and styles.
For superior performance and a sleek, contemporary appearance, consider using stainless steel splash guards. Remember to regularly clean and inspect your splash guards to ensure they remain in top condition, and promptly replace any that are damaged.
How Can You Maintain Your Roof Splash Guard?
To ensure the longevity and effectiveness of your roof splash guard, proper maintenance is key. In this section, we will discuss the various ways you can maintain your roof splash guard. From regular cleaning and inspection to repairing or replacing damaged splash guards, we will cover all the steps you can take to ensure your splash guard is in top condition. Additionally, we will also touch upon the option of installing gutter guards as a preventative measure. Keep reading to learn more about maintaining your roof splash guard.
1. Regular Cleaning and Inspection
Regular cleaning and inspection are essential for maintaining the effectiveness of your roof splash guard. Follow these steps to ensure it remains in good condition:
Remove any debris or leaves that may have accumulated on the splash guard.
Inspect the guard for any signs of damage, such as cracks or loose fasteners.
Clean the guard using a mild detergent and a soft brush or cloth.
Rinse the guard thoroughly with water to remove any soap residue.
Check the surrounding area for any signs of water damage or leaks.
Repeat this cleaning and inspection process at least once a year.
Fact: Regular maintenance of your roof splash guard can prevent water damage to your home’s foundation.
2. Repair or Replace Damaged Splash Guards
To repair or replace damaged roof splash guards, follow these steps:
Inspect the damage: Identify any cracks, breaks, or missing parts in the splash guard.
Remove the damaged guard: Unscrew or detach the damaged splash guard from the roof or gutter.
Measure and cut the replacement: Take measurements of the damaged splash guard to ensure a proper fit for the replacement.
Install the new guard: Attach the replacement splash guard to the roof or gutter using screws or other appropriate fasteners.
Secure the guard: Ensure the new splash guard is tightly secured to prevent future damage or detachment.
Regularly inspect and maintain your roof splash guards to prevent further damage and extend their lifespan.
3. Consider Installing Gutter Guards
Considering installing gutter guards for your roof splash guard? Here are the steps you can follow:
Measure and assess the length of your gutters to determine the number of gutter guards needed.
Choose the type of gutter guard that best suits your needs, such as mesh, screen, or foam guards.
Clean your gutters thoroughly before installing the gutter guards to ensure proper functionality.
Install the gutter guards by securely attaching them to the gutter system, following the manufacturer’s instructions.
Regularly inspect and clean the gutter guards to remove any debris or buildup that could hinder their effectiveness.
If you notice any damage or wear, consider repairing or replacing the gutter guards to maintain optimal performance.
Frequently Asked Questions
What is a roof splash guard?
A roof splash guard, also known as a gutter splash guard, is a small strip of material installed along the edge of a roof to prevent water from overflowing and causing damage to the foundation or landscaping below.
How does a roof splash guard work?
A roof splash guard works by directing water from the roof into the gutter, rather than allowing it to spill over the edge. This helps to prevent erosion, foundation damage, and water damage to the exterior of the home.
What are the benefits of installing roof splash guards?
There are several benefits to installing roof splash guards, including preventing water damage, improving the aesthetic of the home, and reducing the risk of slip and fall accidents caused by overflowing water.
How often should roof splash guards be maintained?
Roof splash guards should be checked and maintained at least twice a year, preferably before the rainy season and after the leaves have fallen in the autumn. This will ensure that they are functioning properly and prevent potential water damage.
Can I install roof splash guards myself?
While it is possible to install roof splash guards yourself, it is recommended to hire a professional to ensure proper installation and to avoid potential injury. A professional will also have the necessary tools and experience to complete the job efficiently.
What types of materials are used for roof splash guards?
Roof splash guards can be made from a variety of materials, including aluminum, vinyl, and stainless steel. The type of material used will depend on personal preference and budget. It is important to choose a durable and rust-resistant material to ensure the longevity of the splash guards.
We’ve got you covered. Call today for a free Quote
Serving northern Arizona, Hahn Roofing has you covered when it comes time for any repairs or maintenance on any residential projects in Sedona and the surrounding area. Call us today for all your questions regarding your home’s specific needs – we’ll help ensure you have access to quality service that meets all your expectations!

 What Materials Are Used for Roof Splash Guards?
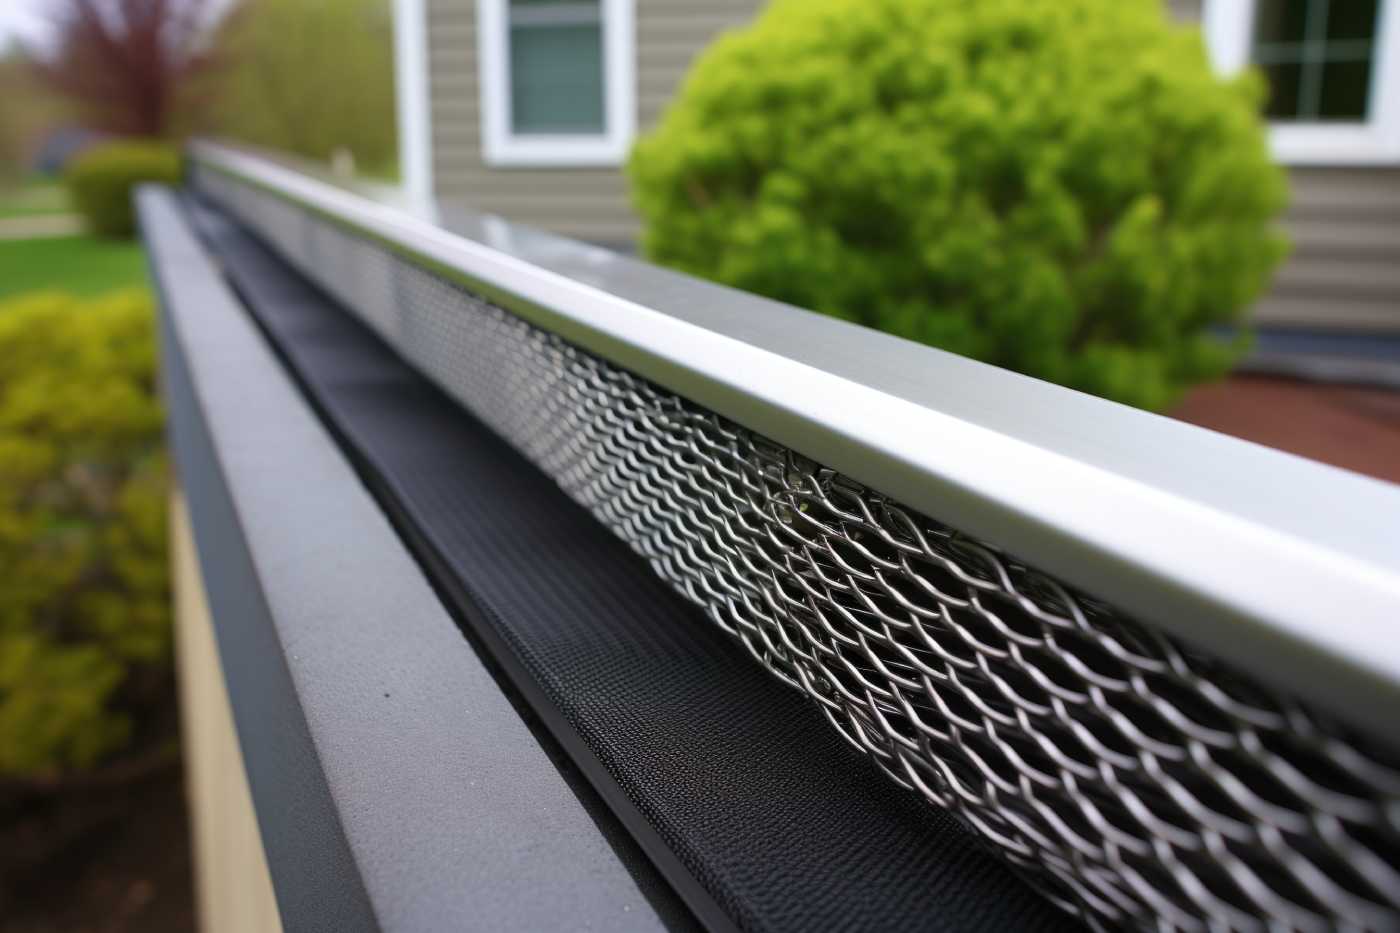 What Materials Are Used for Roof Splash Guards?